Sunday, September 12, 2010

Ammini Kozhakattai

This Saturday morning at my house was filled with hectic activity for Vinayaka Chathurthi celebrations - for the revered elephant headed Hindu god Ganesha, symbolizing prosperity and removing all obstacles to success. This was my maiden attempt at making Ganesha's favorite food - the "Modaka" or "Kozhakattai".

Kozhakattai is a steamed dumpling : a cute little package with a rice flour wrapper and a little something inside. They are stuffed with "Poornam" - a sweet filling made of coconut and jaggery, or sesame and jaggery, or a savory lentil mixture. They all taste delicious, in my opinion.

Now making Kozhakattais is no walk in the park.. I'm sure everyone has had their share of doughy kozhakattais, or ones that develop an unsightly crack after steaming and oozing the stuffing. Anyone who has tried making Kozhakattais will tell you that the trick lies in making soft and pliable dough. I'm far from perfecting the kozhakattai dough, so I'll steer clear of blogging about it for now. What I wanted to write about today(finally!) was actually a tasty by-product of Ganesh chathurthi. Usually families are left with extra kozhakattai dough and end up making Ammini Kozhakattai that evening for that forgotten meal : "tiffin".

The dough is shaped into little balls, steamed, then sauteed with seasoning. It isn't everyone's cup of tea - my significant other R doesn't seem to enjoy it very much, but I like it. It reminds me of my childhood. I was left with a whole lot of leftover dough, so made some Ammini Kozhakattai. I combined some of the leftover filling of the "Uppu Kozhakattai"(the savory kind) with the steamed rice balls and that added some crunch and extra flavor. Making the "Ammini Kozhakattais" is a fun activity, and the entire family can be involved in rolling out these tiny balls. Also, it is much easier to roll out these "Collateral Kozhakattais" as R calls them, compared to making the regular kozhakattais, so I might make more of these than the regular ones!

Rice flour dough balls, ready to be steamed
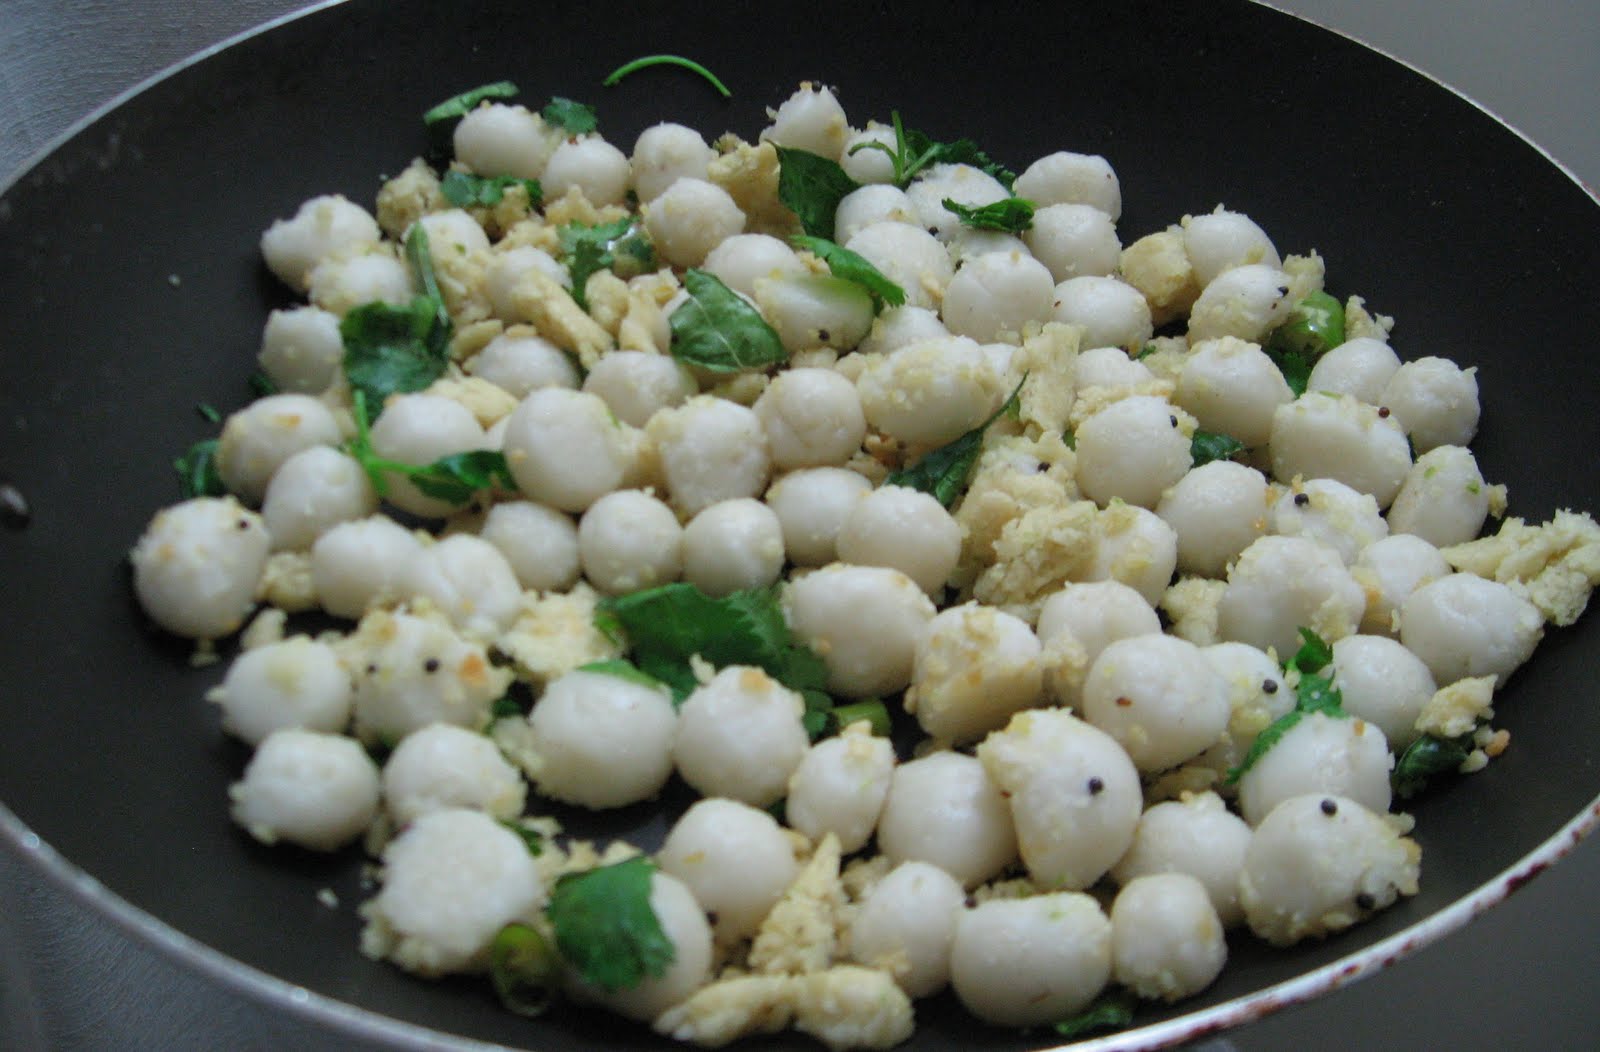
Steamed balls, sauteed with mustard, green chillis, asafoetida, curry leaves and the lentil mixture(optional).

Saturday, September 4, 2010

Coffee Banana Icecream

A couple of years ago, when my dear friend H gifted me an ice-cream maker as a wedding present I was thrilled with the possibilities... home-made ice-cream during the summer, philadelphia-style, without nasty preservatives. Since then, I've experimented with simple ice-creams, adding fruits on hand with cream, milk and sugar. I've tried coffee ice cream before.. it was simple enough - mix cream/milk/half-and-half with instant coffee and sugar, and churn away. The last time I went for a mocha flavor and added chocolate shavings toward the end of the freezing process.

An unusual combination struck me this time . I love bananas (Ahem! Is there a monkey gene somewhere trying to express itself?)  - I love most fruits and all the unique flavors but the banana is my comfort fruit, if you know what I mean. Anyway, I decided to throw in a mashed ripe banana with the coffee and I loved it. I can see people going "yuck!" at this combination, but if you like bananas or have an adventurous palate, I'd say this is worth trying.


Ingredients

3 C Half-and-half (or any combination of milk and cream you prefer)
3/4 C Sugar (Will reduce this to 1/2 C next time, and yes, there will be a next time!)
4 T Instant Coffee
1 large Banana, mashed
1 T Honey

Chill the half-and-half thoroughly. Mix together the sugar, coffee and one cup half-and-half, until the sugar and coffee dissolve completely. Add the rest of the half-and-half, and stir until thoroughly combined. Freeze, following the ice cream maker's instructions. Meanwhile, mash one large banana with the honey and add in the final stages of churning. Freeze at least for an hour before serving. I can see toasted almonds being a nice garnish for this ice cream.

Thursday, August 5, 2010

Gourmet Pizza at home!

Roasted Vegetable Pesto Pizza

Yes, it is possible! Even in my home.While we still eat pizza from the giant take-out chains in a pinch, I always prefer pizza at the local Italian restaurants/pizzerias - non-greasy pizzas that aren't loaded with cheese and "non-traditional" toppings. I've always salivated at the pictures in various food blogs, but never mustered up the courage to try it myself. Well, all that changed today.

The dough resting on the counter.

I made pizza dough using the recipe from Nupur's wonderful blog, modified from Mark Bittman's original recipe. I found the dough extremely simple to work with and it resulted in a wonderfully crisp crust and airy interior. A trip to a few kitchen supply stores, home improvement stores and one tile supply store later, the bottom rack of the oven was layered with unglazed red quarry tiles and I had my baking stone. It was easy on the pocket, and I'm looking forward to baking bread on it.

Unglazed quarry tiles - available at tile supply stores.

The challenge was making pizzas without a pizza peel or a cutter. I'm definitely the wiser for the experience today, and want to invest in these two items as well. This time, I ended up baking the pizzas on a sheet of foil. With a big stash of basil pesto from our home-grown potted basil plant, I decided to make pesto pizzas. One pizza with roasted red bell pepper and zucchini, and another with tomatoes and onions.

Zucchini, Onions and Red Pepper - ready for roasting.

Pizza #1

Pizza #2

This crust is definitely a winner. I might experiment a little to increase the proportion of whole wheat flour, or replace the all-purpose flour with whole wheat pastry flour.. but it is great as is. I'm looking forward to many more home made pizzas. Since the recipe for the crust is from One Hot Stove, I'm submitting this to the Blog Bites #6 event.

Friday, July 16, 2010

Hot Avakkai Pickle

One can wax eloquent about Avakkai - the Andhra-style mango pickle. I got inspired when I saw it here and here.. I found baby green mangoes at the Indian grocery store this weekend, and decided it was time to try my hand at making this traditional pickle.


The mangoes were not as sour as I would have liked. I'm not sure if this is going to impact the taste a lot - I will update the post after tasting it in a week's time.


Traditionally, the mango pieces are cut with the seed wall - I have no idea why - but this requires slicing right through the seed and then pulling out the hard seed and chopping the mangoes with the seed wall. Back in India, the vendors carry special apparatus to do precisely that. My kitchen knife was not sharp enough to cut through the seed, so I ended up chopping the mango flesh alone.


The rest of the procedure is easy - powder mustard seeds, fenugreek seeds and mix with chilli powder, pickling salt and turmeric. Mix with the mango pieces, combine with sesame oil and stir well to combine.


Ingredients

4 C Green mangoes, cut into approx 1 inch sized pieces
3/4 C Pickling salt
1 C Red Chilli powder (I used a little more, since the chilli powder was not too spicy)
3/4 C Mustard seeds (powdered)
1/4 C Fenugreek seeds
250 ml Gingelly oil
2 T Turmeric

Clean and wipe the mangoes thoroughly. Cut with the seed wall intact, if possible. Let dry for about an hour under the fan/in the sun. Combine powdered mustard seeds, fenugreek, turmeric, salt and chilli powder and stir well. In a dry bowl, add the cut mangoes and the pickle powder and mix well. Next, add the gingelly oil. Mix well and transfer to clean glass bottles/pickle jars. The pickle needs to be stirred thoroughly using a wooden spoon for about a week, or until the mangoes have absorbed the flavour from the pickle base. The oil will separate from the pickle and collect on top. In case the mangoes were a little ripe to start with, or the seed wall was not used, store in the refrigerator to maximize shelf life. Enjoy with curd rice!!


 Update : After tasting, I feel there is something missing from the taste of the mangoes. It is important to pick sour mangoes for making Avakkai, as I feel it makes a lot of difference to the end product.

Tuesday, July 6, 2010

Weekend Breakfast

Hearty wheat waffles (Recipe source : King Arthur website)

A delicious blueberry compote to go with it ..


Yumm!

Friday, July 2, 2010

Caramelized Onion Pepper Bread

I first came across this bread at the One Hot Stove, one of the first food blogs I started reading. While the recipe seemed easy enough, and  the description and pictures tantalizing as always, this bread was relegated to the must-try list for a long long time. Well, now that I have a little bit of time on my hands, I decided to make it. What an awesome bread this is! I love savoury breads - wait - I love savoury anything. Also, caramelized onions are a revelation to me - the resulting intensity of onion flavour is worth the 30 minutes of time spent, stirring the onions constantly to prevent burning. The slow cooked browned onions taste like Onion Pakodas..
I followed the original recipe from Baking Bites, with a few modifications which I will not be making the next time. I did not have bread flour at hand, so I made the recipe with All Purpose flour instead, which resulted in a drier bread with a crust that was chewier than I would have preferred. All the same, the bread tasted fantastic. Next time though, I will definitely use bread flour. Also, I had just 1 tsp of yeast on hand, so the first rise took a much longer time. So why am I blogging about this? I think this bread is so good that I want the handful of readers this blog has to know about this.

Wednesday, June 30, 2010

Paruppu urundai Kuzhambu

Want a protein boost to your diet? Run out of vegetables and looking for something satisfying to cook up? It was the latter that prompted me to make this. A traditional Tamil kuzhambu(spicy soup) that is usually served with rice and ghee and a simple vegetable curry on the side. Soul food for me. I loosely followed the recipe from Samaithu Paar by Meenakshi Ammal, my go-to book for traditional South Indian food.

The basic idea is to grind up lentils with some seasoning, make ping-pong sized balls and drop them into a boiling tamarind soup and cook them. It turns out that this requires some practice and careful monitoring of the consistency of said lentil batter, else the balls disintegrate and create a complete mess. So I followed a trick to ensure that the balls don't fall apart - steam them. Yes, it is one extra step. Yes, the lentil balls don't taste as good as when they are cooked in the tamarind soup. However, I'm willing to make the compromise to ensure they retain their shape.

Ingredients

Paruppu Urundai (Lentil Balls)
1C Toor Dal
5 Red Chillis
1/8 t Asafoetida
1 t Salt

Kuzhambu (Soup)
1 T Sesame oil (Canola/Sunflower/Vegetable ok)
1 T Tamarind paste
1 T Sambhar powder
2.5 C Water
1 T Urad Dal
2 Red Chillis
1/4 t Fenugreek seeds
1/2 t Mustard seeds
8-10 Curry leaves
1 T Rice flour (optional)
Asafoetida, a pinch

Soak the Toor Dal in water for 1-2 hours. Grind with the red chillis, asafoetida and salt, adding as little water as possible. Shape the Dal paste into lemon sized balls, as best as possible and steam them for 15 minutes. I steamed them in my Idli stand.

Mix the tamarind paste with water to make up 2.5 cups of tamarind juice. Heat oil and add mustard, urad dal, red chillis, fenugreek seeds and curry leaves. Once the mustard pops, add asafoetida and the sambhar powder. Fry for a few seconds, stirring quickly to prevent burning. Add the tamarind juice and bring to a rolling boil. After 10 minutes, add the urundais, a few at a time, making sure that they have enough room to move around. I had 16 urundais. Allow this to simmer gently for 15 minutes, then make a slurry with the rice flour. Add the slurry to the Kuzhambu, and allow it to boil for 2 minutes before turning off the heat. Serve with hot rice and ghee.

The Kuzhambu was delicious and I will definitely be making this again. Next time, I might be bold enough to cook the urundais in the Kuzhambu itself. It is filling and almost feels like eating Paruppu-usili with Kuzhambu.