Saturday, February 19, 2022

Ragi Laddoos

To keep up with the great demand of " energy balls" from Little M, I decided to use up some Sprouted Ragi flour my parents sent me and make some Laddoos. I have to say- these are the bomb! So delicious! I'm a fan, more so than little M.

Ingredients
1.5 C sprouted Ragi flour
1/3C- 1/2 C ghee
1/2 tsp cardamom powder
2 Tbsp broken cashews
2 Tbsp raisins
2 Tbsp dried coconut powder
3/4 C grated or powdered jaggery

Method
Start with melting 2T of ghee in a hot skillet. Fry the cashews and raisins and then pick them out. Add the Ragi flour in the left over melted ghee and stir constantly. The ghee should be completely incorporated into the flour and the flour should take on a darker color and smell nice and toasty. Finally, add the powdered coconut and roast for a minute. Now, transfer to a mixer and add the grated jaggery along with a few Tbsp of ghee ( I added four) and the cardamom powder. Give it a whirl in the mixer until it gets incorporated. The warmth of the flour should melt the jaggery and the ghee. 

Dump it out into a plate and add the fried raisins and cashews. Mix and while the flour is still warm, work quickly to make laddoos. If it's hard to keep the balls together, add more ghee as needed. At one point, the flour should become easy to shape.

Verdict
I find these positively addictive. 

Energy balls ( Amaranth Peanut laddoos )

Little M has developed quite a sweet tooth now. He asks for sweet treats regularly and I'm trying different " healthy " treats that have some nutrition other than just sugary sweets.

I don't have an exact recipe for most of these, because this is my first time making these treats and each time has been an experiment.

For these scrumptious amaranth laddoos ( Energy balls, as little M likes to call them), here is the rough sketch.

Ingredients
1 C popped amaranth
1/3 C jaggery
1 Tbsp water
2 Tbsp ghee
1/4 tsp cardamom powder
1 C peanut butter

Method
Melt the jaggery in the water and boil until it reaches softball stage. Add ghee and cardamom and the popped amaranth and mix well. Turn off the heat and start making balls. This failed for me- it was an unholy crumbly mess. So I added peanut butter until it came together. 


Monday, February 7, 2022

Miso Ginger Soup

We've been getting pelted by colds and coughs for the last several months. Little M finds this soup the most appetizing and comforting among all the foods offered to him. 

Ingredients 
2 C water
1 Tbsp freshly grated ginger
Handful of cilantro( leaves and stems) finely minced
1/8 tsp fresh ground pepper
1 allspice, crushed
1 star anise
3 scallions, sliced
1/3 C tofu cubes
1/2 Tbsp soy sauce
1 Tbsp Miso paste


Method 
Bring all ingredients except for the soy sauce and the miso to a boil. Cover and simmer for 15 min. In a small bowl, dissolve the miso paste in a few tablespoons of the broth. Turn off the heat and return the dissolved miso into the main pot. Add soy sauce to taste and serve immediately. 


Sunday, October 17, 2021

Tendli Bhaat

I love this stuff. It's so flavorful. This is Tendli Bhaat, my way.

Ingredients 
3 C Ivy gourd - slit lengthwise or chopped into rounds
2 C rice
3 T oil
1 tsp mustard seeds
1 tsp Cumin seeds
4 cloves garlic, chopped
1/4 C cashew nuts
2 tsp tamarind paste
2 tsp Goda masala
1/2 tsp Turmeric powder
4C water
10-15 curry leaves
1/2 C shredded coconut
1/2 C chopped cilantro

Method 
Wash the rice thoroughly at the beginning and let it rest. Heat oil in a pressure cooker or instant pot. Add mustard and cumin seeds. Once they pop, add the curry leaves and cashew nuts along with asafetida. After a few seconds, add the ivy gourd pieces, garlic, and the powders. Saute for 5 minutes. Next, add water, tamarind paste, and salt. Mix well. Proceed to cook the rice as usual if using a pressure cooker. Or, if using an instant pot, use manual mode high pressure 8 minutes with natural release. Garnish with fresh shredded coconut and cilantro.

Final notes 
- I ran out of Goda masala this time and I subbed garam masala. Sure, it isn't the same, but not a disqualifier
- I ran out of cashew nuts and threw in some sliced almonds instead. The texture it brought did work.
- I like using tamarind in this. I enjoy the acidity it brings to the party.


Wednesday, October 13, 2021

Black eyed peas Sundal

Sundal is a preparation of seasoned and cooked legumes. During Navarathri it is customary to prepare Sundal as neivedhyam every day. Many Indian families prepare a different legume each day of the nine day festival.

Texture is an integral part of a good Sundal. The legume must be thoroughly cooked but retain it's structural integrity. It should absolutely not become mushy.

I was not sure how little M would like Sundal, since in the past, he has had trouble with the texture. He surprised me by digging into it with gusto. I'm determined to make this a part of the regular meal rotation, since it's so nutritious.

Ingredients 
1 C dried black eyed peas
1 T coconut oil
1 tsp mustard seeds
1/4 tsp black pepper powder
1/4 tsp Turmeric
1 T coriander powder
Pinch of asafetida
1 T minced ginger
10 curry leaves
Hand full of minced cilantro
1 T lemon juice
salt

Method 
Soak the dried peas overnight in plenty of water. Drain and cook with 2.5 C water. I used the instant pot, manual mode high pressure 8 minutes with natural release. Drain the cooked peas.

In a hot skillet, melt the coconut oil. Add mustard seeds and wait for them to pop. Add asafetida and curry leaves and fry for a few seconds. Add the rest of the ingredients except for lemon juice and cilantro. Mix well and cook on medium heat for 5-10 minutes. Add the lemon juice and garnish with chopped cilantro stems and leaves.

Happy Navarathri!


Sunday, September 5, 2021

Popsicles!

I remember eating delicious frozen kulfi on hot summer days. My mom would make them in blue moulds. I don't recall clearly, but I think they came with "Milkmaid" condensed milk tins. These memories made me want to prepare popsicles for Little M. I was eagerly awaiting his reaction to these cold treats - especially he had never had anything like it before. 

The first time I prepared popsicles, I made it too berry-heavy. It became too tart. Little M humored me and spent a few minutes licking the popsicle, but I realized I had to make some adjustments to the sweetening. The first recipe I made had berries, lemon juice and a smidge of honey. That just didn't cut it.

Today, I used a slightly different combination of fruits and this worked out well. M sucked the last drop off the popsicle stick.


Ingredients

2 large ripe bananas

8-10 strawberries

1/2 C pineapple juice


Method

Blend together and pour into popsicle moulds. Freeze for a minimum of 4 hours before un-moulding.


Peanut Chutney

Having Idli or Dosa batter ready to go is such a boon! 5.30pm is a busy time in our kitchen. Dinner prep begins in full swing. After a busy work day, some days it is convenient to have Idly or Dosa for dinner with a vegetable on the side. Little M loves these foods and he likes dipping the pieces in a chutney or podi.

One chutney that takes very little time to throw together is this one, if you have roasted peanuts on hand. It is a "raw" chutney. For something so simple, it tastes quite delicious. I think it would make a good salad dressing as well.


Ingredients
1/4 C crushed roasted peanuts
1 tsp minced ginger
Handful of chopped cilantro
1 tsp date syrup
3 Tbsp lemon juice
Salt to taste

Method
Blend all ingredients in food processor or mixer. Taste and adjust balance of sour, sweet, and saltiness. 


Saturday, August 28, 2021

Lemon Rasam

In the summer, I love to have lemon rasam. It is light, refreshing, and not very spicy. Which also makes it perfect for kids. 

Little M loves lemon. We're extremely lucky to have a beautiful lemon tree in our backyard. So, we always have lemons on hand and I often add a spritz of it on foods before serving it to him.

Ingredients
1/2 C Toor Dal
2 medium lemons, juiced - about 1/3 cup
2 tomatoes, diced
1 T minced ginger
1/4 tsp Turmeric
2 cups water
2 mild green chilis, slit
Handful of cilantro leaves and stalks, finely chopped

1 T oil or ghee
4 or 5 curry leaves, torn
Mustard
Asafetida

Method
Cook the Toor Dal with turmeric and one cup water until soft and the lentils break apart. In two cups water, add the tomatoes, ginger, green chilis, and cilantro stalks. Bring to a boil, then cover and reduce to a simmer. Cook for 10 minutes or until the tomatoes are soft and mushy. 

Mash the cooked Dal with the back of a large spoon or a potato masher and add to the cooked tomatoes. Add salt and turn off the heat once the mixture comes to a boil. 

Prepare the tempering by popping mustard seeds in oil or ghee. Add asafetida and the curry leaves and let it roast for a few seconds. Add the tempering to the rasam. Now pour in the lemon juice and the chopped cilantro leaves.

Enjoy with steamed rice.


Thursday, August 26, 2021

Swiss chard Dal

This dal is like a hug from your mom. It is comforting, nourishing, and delicious. 

I used red Swiss chard - with bright red stalks and red ribs running through the gorgeous green leaves. As they cook, they retain shape better than spinach but are still soft. 

Swiss chard pairs extremely well with garlic. Some times, I like to do a simple sauté of chard and garlic in olive oil with red pepper flakes and salt. Yum. Other times, I cook it with lentils. I have tried Toor and Moong, but this time I went with Masoor Dal. 

Little M loved eating the soupy Dal as well. 


Ingredients

1.5 C Pink Masoor Dal, rinsed several times

1 bunch of red ribbed Swiss chard, cut into thin ribbons after trimming the very ends of the stalk

3 fat cloves of garlic, sliced 

1 Tbsp oil

1 tsp Jeera seeds

1 tsp Jeera powder

1 tsp Dhania powder

1/4 tsp turmeric

1/4 tsp black pepper or red chili flakes

3 C water

salt to taste


Method

Heat oil in a pressure cooker (or instant pot). Add jeera seeds and wait until they sizzle. Add the chopped chard, garlic and the various powders and mix well. Add the washed Dal and water and cook under high pressure in the instant pot for 6 minutes (natural release) or in the stovetop pressure cooker, as you would cook lentils. Note that Masoor dal can turn to mush very quickly so adjust times accordingly. After opening the cooker, add salt and more water to adjust to desired consistency and bring to a quick boil. Serve in a bowl with a big dollop of ghee.


Wednesday, August 25, 2021

Thai curry with vegetables and tofu

 A very simple and flavorful curry that can be prepared in 30 minutes start to finish. We love this creamy, spiced gravy with a generous helping of vegetables and tofu served alongside a steaming bowl of rice. I think I have previously blogged a green curry recipe where I made the green curry paste myself. There is no contest - using a fresh, homemade curry paste will knock your socks off. But there are priorities. When you don't have a bunch of time to collect the ingredients and make your own curry pastes, the ready-made pastes come to the rescue. 

The basic version of this is almost a non-recipe. Plus, we all get to eat the same dinner which means I don't have to spend twice the amount of time in the kitchen making M's dinner and our dinner. That's what makes it a winner, in my book. But enough chitchat.


Ingredients

4 cups of diced mixed vegetables - any combination of peppers, squashes, yams, potatoes, broccoli/cauliflower, carrot

1/2 block or 7oz pressed or extra firm Tofu, diced into half inch pieces

1 onion, sliced thin - optional

1 T neutral oil

1-2 heaped T curry paste, always check the spice level

1 14oz can of coconut milk, well shaken  - low fat if you are feeling virtuous

1 C water - or more, depending on desired consistency

Fresh basil or cilantro for garnishing


Method

Heat the oil and if you are using onions, brown them lightly with some salt. Add the mixed vegetables (yes, all at once) and lightly sauté them for 2 minutes. Add the curry paste, the coconut milk, and the tofu. Rinse out the coconut milk can with water and add 1 extra cup of water. If using an instant pot, set it on low pressure mode for 7 minutes with natural pressure release. If using a stove-top pressure cooker, cook like you would if you had to steam vegetables (like potatoes) - whatever that takes in your pressure cooker. Garnish with fresh basil or cilantro.


The ardent reader might have noted the absence of any "heat" in my recipes. That's because this food is kid approved :) I don't know why, but my coconut milk split a bit today. I think it might be because I neglected to shake the can well and the coconut fat was separated to begin with. It didn't bother me too much, since it doesn't happen often. I like using this method since it is completely hands-off after cutting the vegetables and dumping them into the instant pot. But if I have some time to spare, I might just add the coconut milk after the vegetables cook with the curry paste and then simmer for 5 minutes on low heat. That will ensure the coconut milk doesn't split.


Creamy scrambled eggs

As a baby, M took a while before he could tolerate texture in foods. He would find the smallest of seeds in blackberries or the smallest piece of fruit skin and reject the food. So, I had to find a way to prepare eggs that both ensured it as fully cooked and safe for a baby to consume as well as maintain a creamy texture. This is challenging since eggs turn rubbery when cooked.

After much web searching, I chanced upon Gordon Ramsay's scrambled eggs recipe. It works beautifully. I season it liberally either with basil and flavored olive oils and a dash of lemon juice or some garam masala and lemon juice. M seems to enjoy either combination. He also loves acidic foods and the lemon helps this go down easy.

The added bonus of this dish is that you get an arm workout for free! It requires continuous stirring. A few seconds away and you can overcook the eggs. So, it is important to keep all the ingredients prepared and ready to deploy before beginning. These are wonderfully creamy eggs and quite decadent. 


Ingredients

1 large egg

1 Tbsp unsalted butter

1 heaped tsp cream cheese or thick yogurt or sour cream

Salt and Pepper to taste

dried basil/flavored olive oils

1 tsp lemon juice


Method

In a non-stick pan, add the egg and butter together and start with medium heat. Use a rubber or silicone spatula and work to break down the eggs as the butter melts. Keep stirring and scraping the sides of the pan. Once the eggs are completely broken up they will suddenly start to thin down and become quite watery. At this point, turn down the heat and keep stirring, continuously. A minute or two later the eggs will suddenly start to get creamy. Go easy at this point and watch it like a hawk. Take off the heat before they seem completely cooked since it will continue to cook in the pan. Add the cream cheese or yogurt or sour cream at this point and mix well to arrest the cooking. Now add all seasonings like salt and pepper and others.


I'm back, with a new focus.

Okay, so I disappeared for a few years. A lot has happened, since. An addition to the family meant that my exploration in the kitchen has been limited and has taken on an entirely different dimension altogether.

I now cook with a newer audience member in mind - little M. Henceforth, this blog shall primarily (but not exclusively) serve to document foods I prepare for M. 

See you soon!

Sunday, April 24, 2016

Easy mixed berry cobbler

Last night, I threw together the fastest dessert I have ever made. Surprisingly, it was one of the best desserts I have ever had. How often do you get rewarded for not putting in a whole lot of effort? I used this fantastic recipe and only made minor modifications. 

Ingredients
2 - 2.5 C frozen or fresh mixed berries
3/4 C all purpose flour
3/4 C milk
1/2 C sugar
4 Tbsp unsalted butter
1/4 tsp salt
1 tsp baking powder
1 tsp vanilla extract
1 tsp almond extract

Melt the butter in a pie dish. Mix together the flour, sugar, salt, baking powder, milk, and the extracts. Pour into the pan. Scatter the berries in the batter. Top with a tablespoon of sugar. Bake for 45-50 minutes in a 350F oven. Serve warm, with a scoop of vanilla ice cream for an extra special treat. Bliss!


Notes : 
  • 1/2 C sugar was plenty. In fact, it was a little sweeter than I prefer. Maybe the berries were very sweet by themselves. I will use a bit less sugar next time. 
  • I loved the almond flavor with the berries. 
  • Lemon zest might accent the flavors really well.

Saturday, January 16, 2016

Wheat Bread

It all started with my buying a big jar of instant yeast. It seemed like such a good idea at the time.. I had visions of myself surrounded with an array of delicious, fluffy baked breads. I would wake up early on Sundays and bake two loaves of bread, that would be consumed over the week. We would never have to buy bread again... This is how I convinced myself that the big jar of instant yeast was a great investment. Sure to pay for itself.

Months slipped by. The unopened jar started back at me every time I opened the cupboard, reminding me of my lofty dreams. Finally, last week, along with the rush of energy that accompanies one during the new year, I decided that I was going to bake some bread.

I wanted to try a whole wheat bread. I've made the caramelized onion bread a few times now, some foccacias, but never a whole wheat bread. Whole wheat yeasted breads can be intimidating. A quick perusal through the cookbooks in my home got me all discouraged at first. They recipes involved complicated steps (start a biga, knead-rest-knead-rest-knead-rest.. I lost track of the number of times and the amount of time for each step). Also, I didn't want to burn my whole weekend baking bread.

This recipe, however, was inviting. It comes from the magnificent Smitten Kitchen, where pretty much every recipe I have tried is a whopping success.

I made some minor modifications to the recipe, that I note here ( I *have* to tinker). First, I made a half batch. Second, I substituted bread flour for part of the whole wheat flour.

Ingredients
1/2 C + 1/8 C water
1/2 C + 1/8 C milk
2 T molasses
2 1/4 tsp instant yeast
2 T oil
1 egg
1 C quick cooking oats
1 1/2 C whole wheat flour
1 C bread flour
1/2 T salt

Procedure
Heat the milk and the water together in the microwave, until lukewarm to touch. Add the molasses, yeast, oil and egg and whisk together until well combined. It is easier to beat the egg separately and add instead of combining it with all the liquid. Add the oats, the flours and the salt and stir well until combined. Let the batter rest for about 5-10 minutes. After that, mix vigorously for about 10 minutes, starting with a wooden spoon and then with your hands. I was a bit lazy and only kneaded for 5 minutes.

Proof the dough for about 2 hours, or until the volume doubles. Punch out the air at that point, and plop it into a greased baking dish. I didn't bother with the fancy rolling and shaping. Maybe next time..

Let the dough rest and rise again for another hour. Then bake in a 350 F oven for about 45 minutes, or until the bread sounds hollow when tapped. Let it cool before removing from the pan. It came out without much trouble.

Verdict 
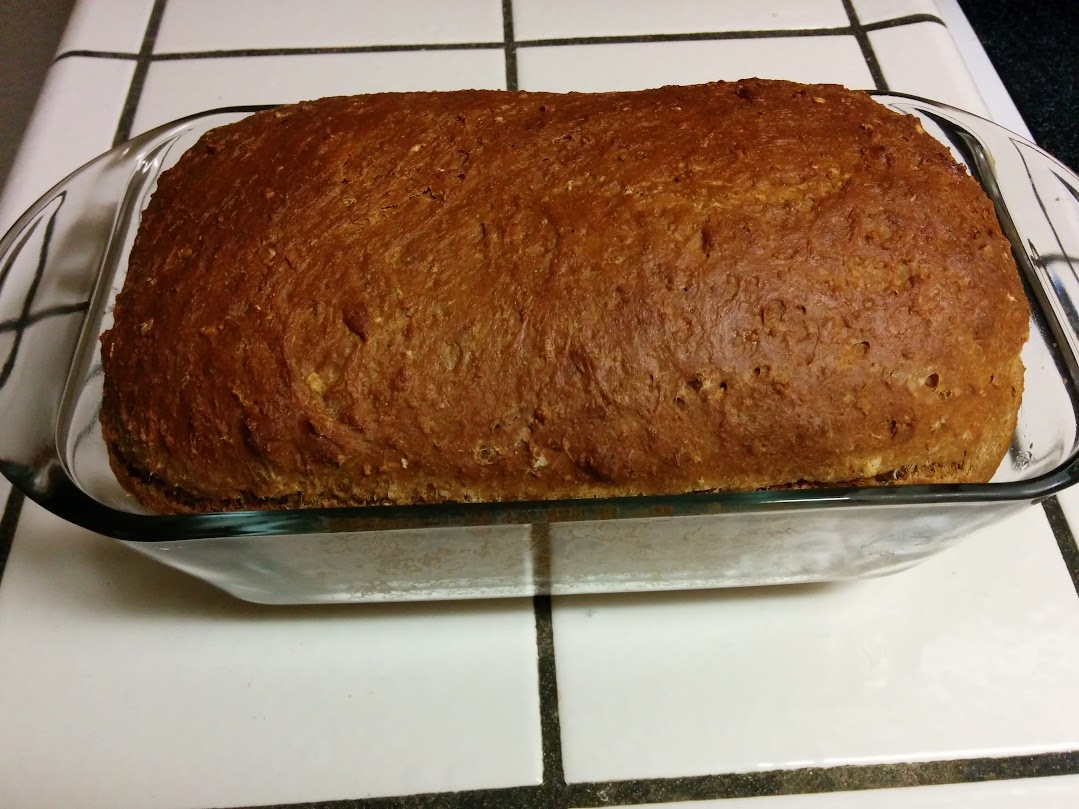
The bread tasted great. It tasted of whole wheat, with a hint of molasses. The molasses imparted a fantastic dark brown color, that I loved. During my childhood, my parents regularly bought bread at a fantastic bakery : Universal Bakery on Kutchery Road, Luz, Chennai. This bread reminded me of that. It's not quite there, but similar.

The bread kept well for a week, and was very hearty. May be it is the oats that makes it so filling. I will try this again, but one thing that I had trouble with was the number of crumbs. I had to slice pretty thickly to prevent the bread from breaking apart. Maybe I'll be more diligent about the kneading and shaping the next time.


Wheat Bread with oats, right out of the oven. It smells like a bakery here!
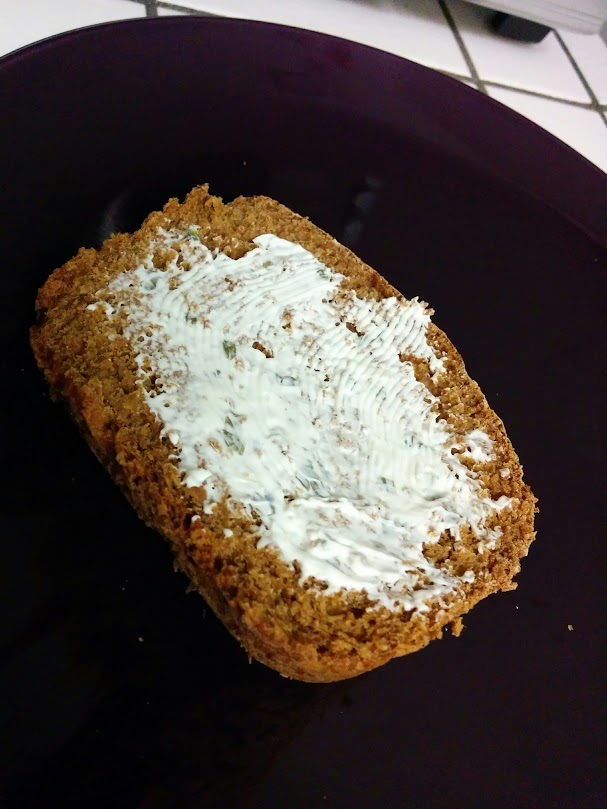
Look at the gorgeous dark brown. It reminds me of the bread at Universal Bakery in Luz, Chennai.

Yum.


Friday, January 1, 2016

Happy 2016!


Happy New Year!! I have neglected this space for a long time. I'm hoping to be more active this year.

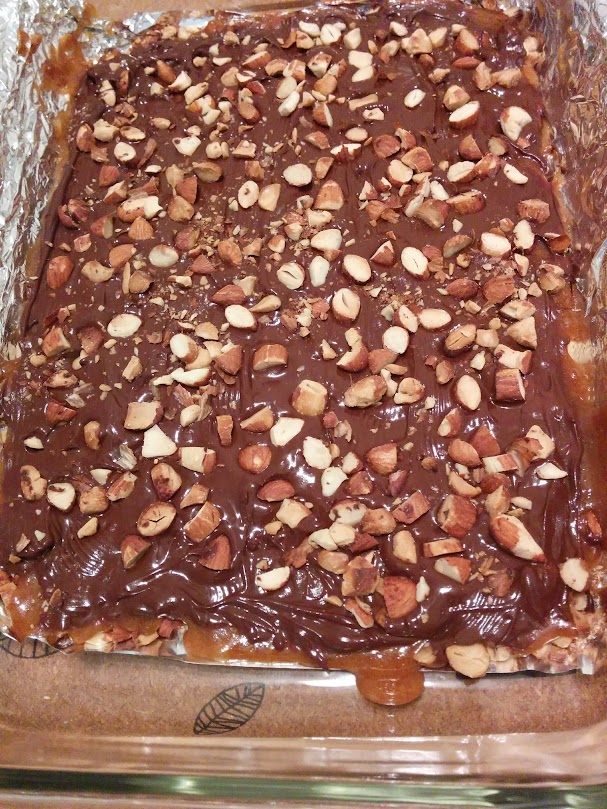
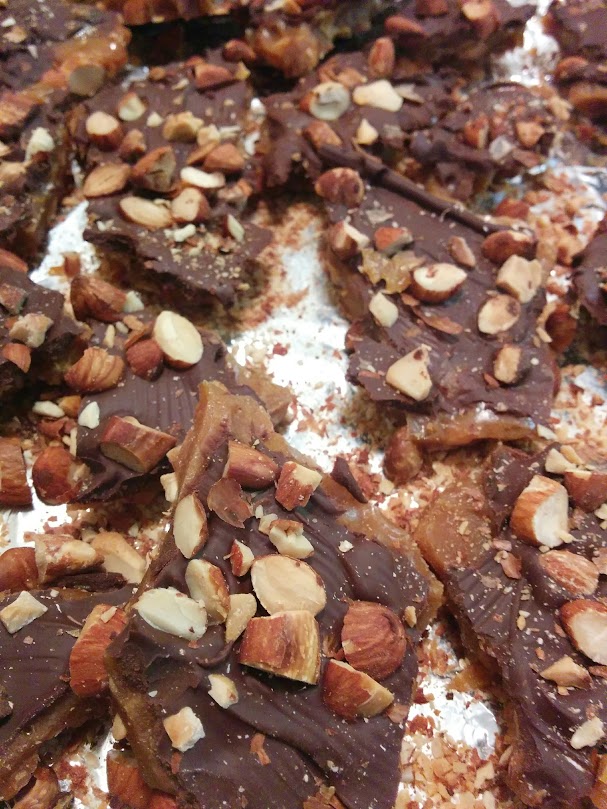
I'll start off with a sweet treat I made in 2015 to give away as gifts. These were incredibly good and easy to prepare as well. I followed David Lebovitz's recipe exactly and that is what I would do the next time as well. I can't wait to make another batch!

Things to note :
a) Watch the almonds like a hawk while they are toasting. Over toasted almonds get bitter!
b) Chop them by hand. This is time consuming, but the effort is worth it.


The buttercrunch cooled for hours before it set completely. It took about 5 hours on a winter evening!

This was unbelievably delicious.


Sunday, December 28, 2014

Cranberry Almond biscotti

A wonderful recipe for biscotti, from the fantastic Smitten Kitchen blog. I made small adjustments to the recipe, as noted here. The cranberry almond combination is a winner and I will be making this again. I was worried it was too crumbly, but in the end, the texture was fine. My biscotti were a little tubby, but they were delicious!


Ingredients

3 C flour
1 Tbsp baking powder
1/3 tsp salt
1/2 C or 8 Tbsp butter, at room temperature
3 eggs
1 C sugar
1 Tbsp orange zest
1 Tbsp vanilla
1/4 tsp almond extract

1 C slivered almonds
1/3 C dried cranberries

Whisk together butter, sugar, eggs, zest, vanilla and almond extract. Sift flour, baking powder, salt and add to the butter/sugar mixture. Stir until combined and all the flour is incorporated well. Add the almonds and cranberries and mix well to combine.

The dough is sticky. Work with your hands if needed. Transfer to a floured work surface and add small amounts of flour as needed. Shape into 2 logs.

Preheat oven to 350 F. Grease cookie sheet  and place the logs with about 2 inches clearance from the edges and from each other.

Bake for 25-30 minutes, until lightly browned. Allow to cool completely.

Slice on a bias with a serrated knife and lay flat on the same baking sheet. Bake on one side for 8 - 10 minutes and flip them. Bake them on the other side for 6-7 minutes before removing from the oven and cooling completely.

Store in an air tight container.

Mine came out slightly crumbly. I knew this was going to be an issue when I tried to slice the log after the first bake. I think this might be because I used slightly less butter than the original recipe called for.


Saturday, November 8, 2014

Homemade Mixture

Searching for a snack with a satisfying crunch on a weekend afternoon, I tried yet another recipe from the wonderful Nupur's blog. Honestly, I have lost count of the number of recipes I have tried from her blog! Well, as they say, imitation is the sincerest form of flattery and all that! I feel truly lucky to live at a time when the internet facilitates the sharing of wonderful ideas.

It all started when I spied a bag of puffed barley at a grocery store and was struck by how it resembled Pori or Puffed Rice. I was also momentarily seized by a feeling of virtuousness. "We shall have no more store bought fried snacks at home!", I decreed to R. I shall make a healthy mixture that we can snack on using this undeniably healthy puffed barley.

I tasted the puffed barley upon returning home and it was nothing like Pori. In fact, it tasted awful. A bit like rotting cardboard, I thought to myself. But I had to salvage this gigantic bag! I quickly found inspiration in Nupur's Chivda and Bhadang recipes and decided to combine the two.

I have to say, since that first time, I have made this Mixture 3 times. We usually run through it pretty quickly. And you do end up feeling virtuous after eating a bowl of this Mixture.


Ingredients

2 T sunflower oil
1 t mustard
1 t saunf
10 - 15 curry leaves
1 t red chili powder
1 t sugar
1 t turmeric
2 C poha
1/3 C raw peanuts
1/2 C dried cranberries or raisins
1/2 C Pottu Kadalai or Roasted Gram
1 C store bought Sev
1 C puffed barley
Salt, to taste

Heat the oil in a large pan, preferably wide and not very tall. Add mustard seeds and once they have popped, add the peanuts and curry leaves. When the peanuts begin to turn light brown, add the poha and turmeric and stir well. The poha will absorb all the oil and get toasty.

Another way is to roast the peanuts separately and add them after the poha has got toasty. Add the red chili powder, salt, Pottu kadalai and puffed barley at this point and continue to roast for 2 minutes, stirring frequently.

Add the sugar, dried cranberries and store bought Sev.  Allow to cool completely before storing in an air tight container. It stays fresh for about a week, by which time we usually finish it.


Sunday, August 3, 2014

Soba noodles with Lime Cilantro Pesto

Resuscitating this blog after years..

Having moved next to an Asian food market, I'm discovering many interesting ingredients and experimenting a bit. I once ate cold Soba noodles with a dipping sauce (which was mostly soy sauce with garlic and scallions) at a Japanese restaurant and found it to be a delicious summer lunch. Since then, I have been trying to use Soba noodles more. Inspiration struck when I ate a Cilantro Pesto pasta salad at Sweet Tomatoes - I decided to combine Cilantro Pesto and the Soba noodles.

This is a delicious cold lunch and tastes even better the next day. It also requires very little prep work - the Pesto is easily prepared in the blender and a bunch of vegetables can be chopped while the noodles boil.

The washing of the soba noodles once cooked takes a few extra minutes ( they need to be rinsed several times in cold water to remove the starch ) but the results are worth the effort.


Cilantro Lime Pesto:

1 bunch of cilantro, leaves and stems, roughly chopped
2 big cloves garlic, smashed and roughly chopped
1 inch piece of ginger, minced
1/3 C sunflower seeds, toasted
1/2 tsp red chilli flakes
1/2 tsp black pepper, ground
1-2 T oil (toasted sesame or canola)
2 limes, zested and juiced
salt to taste
Add some pasta water to loosen up the paste

1 package of soba noodles, cooked and rinsed at least 2 times in cold water

2 cups of carrots (thinly sliced) and broccoli (steamed in the microwave)

Grilled Tofu for some Protein

1 bunch scallions: thinly sliced

Toss all together. Yum!!


Sunday, January 27, 2013

Butternut Squash Khichdi

Ingredients
1 Whole Butternut Squash, cooked and cubed
1 C Rice
0.5 C Masoor Dal
4 C Water
1 T garlic, finely minced
1 T ginger, finely minced
1 T oil
1 tsp mustard
3 dried red chillies
2 bay leaves
0.5 tsp Turmeric
Red Chilli Powder, to taste
2 tsp Goda Masala
Chopped cilantro for garnish

Initial Prep:
Squash: Cook the butternut squash by microwaving on HIGH for 6-8 minutes. The cooking time may vary depending on the microwave and the size of the squash. Allow to cool, and then peel, scoop out the seeds and dice into 1 inch cubes.
Rice: Wash and soak the rice and Masoor Dal in water.
Method:
Heat oil in a large pressure cooker and add mustard seeds. When they start to pop, add the bay leaves and dried red chillies. After a few seconds, add the cubed squash, ginger and the garlic and saute for 10 minutes on medium heat, or until the raw smell from the garlic and the ginger disappears and the squash starts to brown. Drain the rice and the Dal and add to the pressure cooker. Add chilli powder to taste, and the Goda masala. Add 4 cups of water, and salt to taste. Cover and cook, as you would normally cook rice in the pressure cooker.

Allow the steam to release naturally and garnish with coriander. Serve with a dollop of ghee and some curd on the side. Yumm.

Sunday, December 2, 2012

Green Olive Hummus

Ingredients

- Half a jar of green olives, perilously close to being trashed
- 2 tsp Dijon mustard
- 2-3 Tbsp Olive oil
- 1 can of Garbano beans, drained and rinsed
- Juice of 1 lime
- salt and pepper to taste

Blend it all in the mixer.

Simply delicious.